
Mixed media is all about bringing different art supplies together in one piece—think paint, paper, ink, and even everyday objects. It’s a creative approach that throws the rulebook out the window, encouraging artists to play with texture, layers, and all sorts of mediums to build something with real depth and dimension.
Building Your Mixed Media Foundation
Welcome to the wonderfully chaotic world of mixed media, where creative freedom is the name of the game. This isn't just about throwing different paints on a canvas; it's a deeply personal way of working that lets you blend materials to tell a unique story. The real magic is in the boundless potential to create depth and texture that a single medium just can't match on its own.
While it feels very modern, this idea of mixing things up has been around for a while. The roots of mixed media as we know it today can be traced back to Pablo Picasso. In 1912, his piece “Still Life with Chair Caning” famously combined oil paint, pasted paper, and even a piece of rope. That one artwork smashed the walls between painting and sculpture, paving the way for movements like Cubism and Dada to embrace unconventional materials.
So, What Actually Defines Mixed Media Art?
At its heart, mixed media is simple: it’s using more than one medium in a single artwork. This could be as basic as adding ink details to a watercolor painting. Or it could be as complex as working fabric, sand, and metal scraps into an acrylic piece.
There’s a natural connection between this approach and abstract art, as both tend to focus on emotional expression over a perfect, realistic depiction. If this idea is new to you, learning how to understand abstract art can give you a really solid footing for your own mixed media experiments.
A few things you'll see again and again in mixed media are:
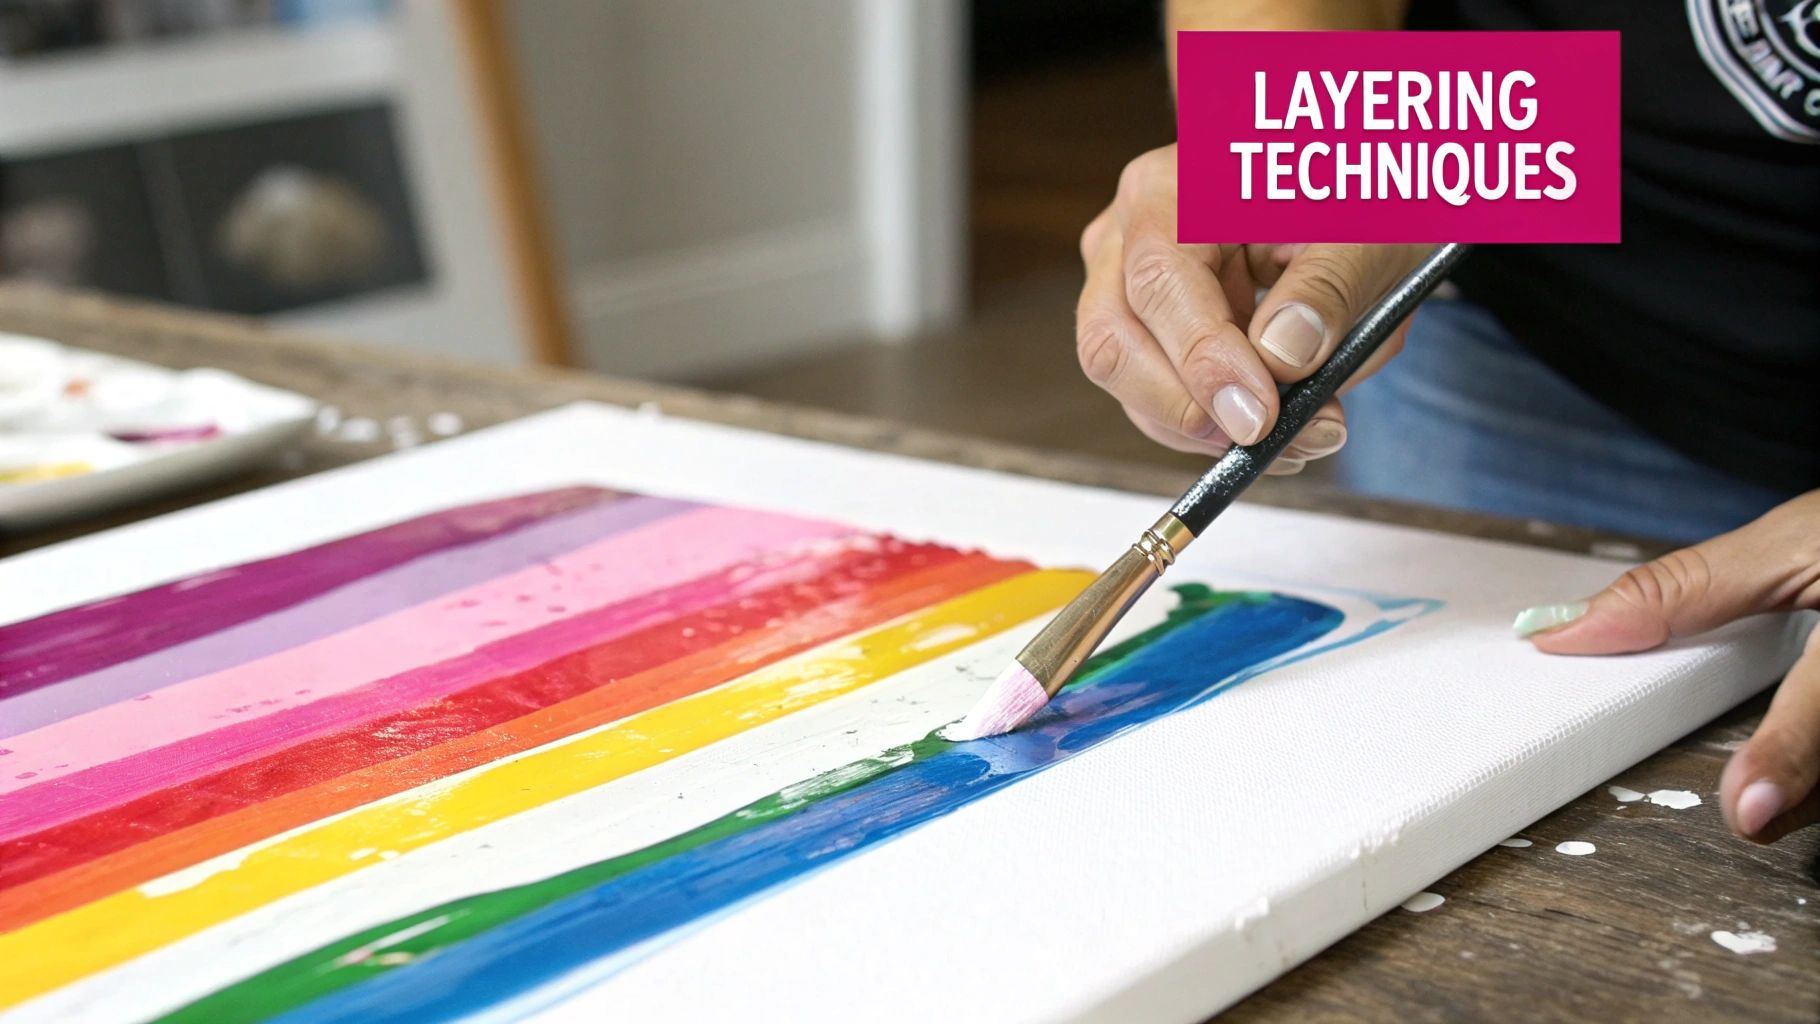
- Layering: This is fundamental. You build up surfaces with different materials, creating a sense of history and visual depth in the work.
- Texture: From smooth, glossy glazes to gritty, rough pastes, texture adds a tactile quality that invites people to look closer.
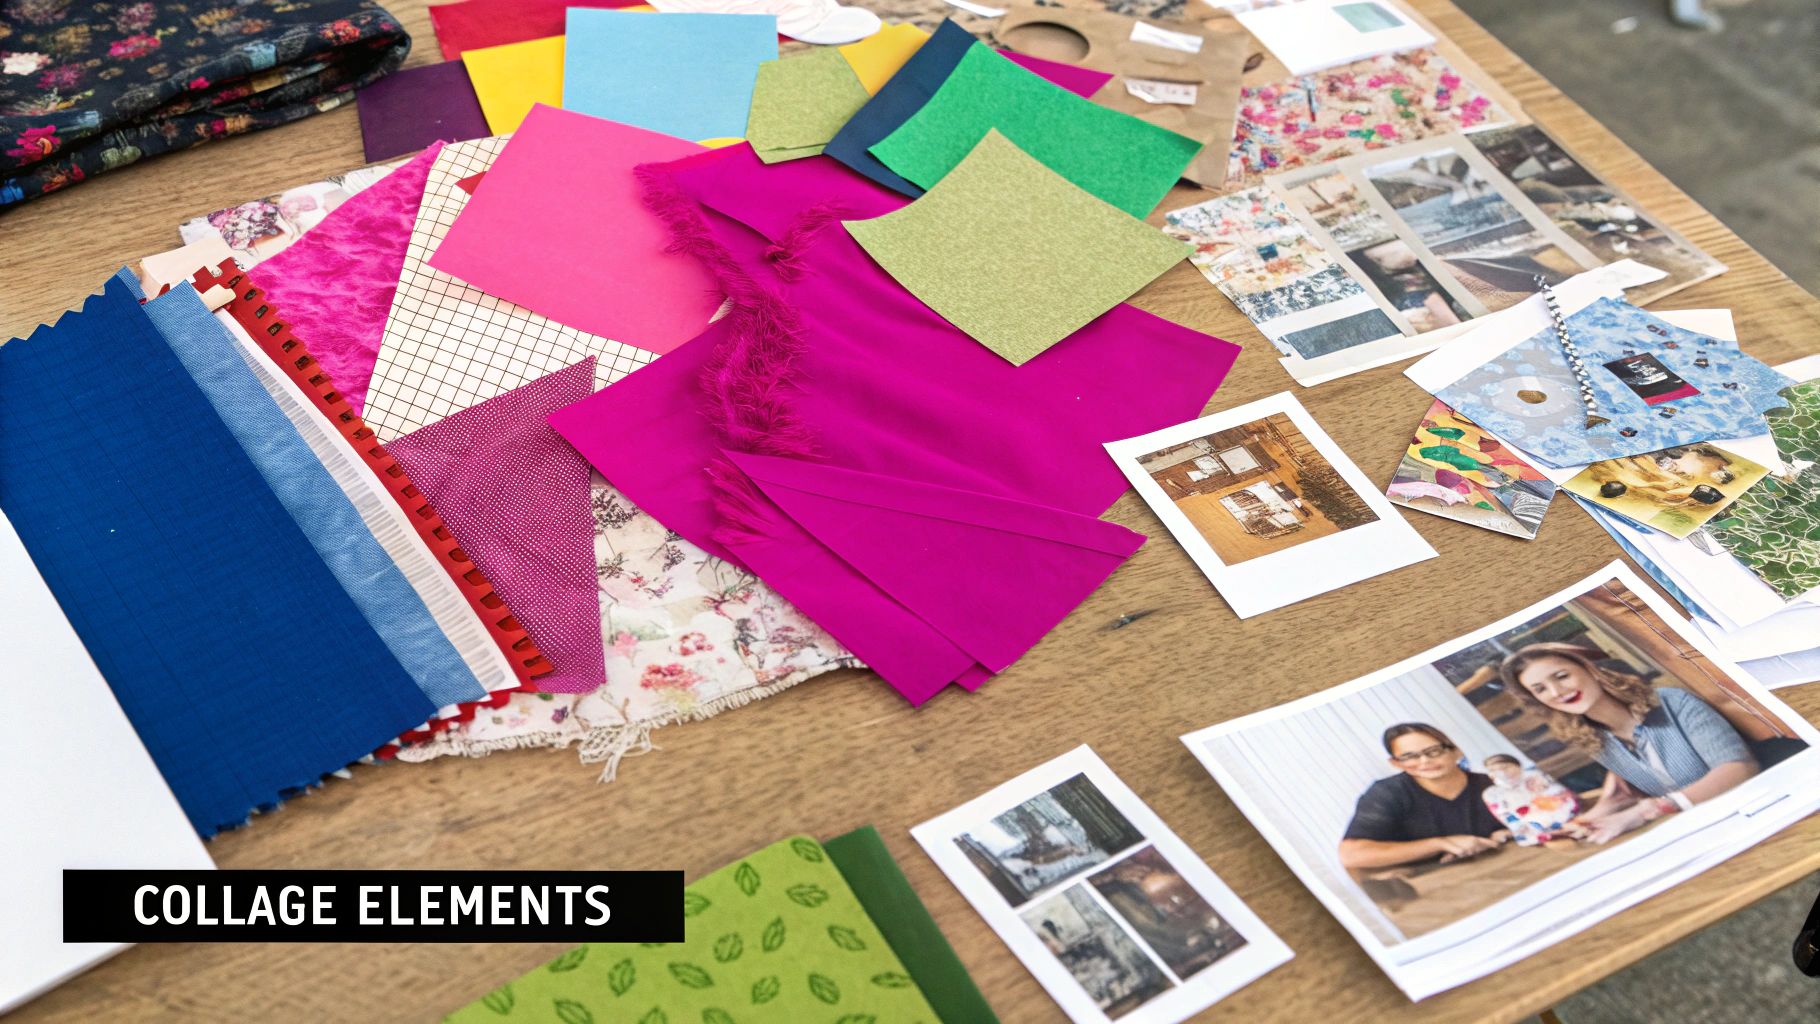
- Collage: This involves adding paper, photos, or fabric to bring in graphic elements or tell a specific story.
- Assemblage: Think of this as 3D collage, where you use found objects to construct parts of your artwork.
Why Artists Love This So Much
Honestly, the biggest draw of mixed media is the freedom. You aren't boxed in by the rules of a single medium, which opens the door for a much more intuitive and spontaneous creative flow.
This way of working trains your brain to see the artistic potential in everything. Suddenly, forgotten paper scraps and discarded junk become essential parts of a new story. It completely shifts your focus from chasing technical perfection to finding your authentic voice.
Your Essential Mixed Media Starter Kit
Getting started doesn't mean you need to buy out the entire art supply store. In fact, you probably have a lot of great materials already. The key is to start with a few versatile basics and build from there.
This table breaks down the core supplies I recommend for anyone diving into mixed media.
| Material Category | Specific Examples | Best For | Pro-Tip |
|---|---|---|---|
| Surfaces | Mixed media paper, wood panels, canvas boards | Creating a sturdy base that can handle wet and dry layers | Always gesso your surface first! It creates a sealed, consistent foundation for your paints and glues. |
| Paints | Acrylics, watercolors, ink sprays | Building up background colors, adding washes, and creating vibrant marks | Acrylics are your best friend—they dry quickly and are waterproof, so you can layer over them easily. |
| Adhesives | Matte medium, gel medium, Mod Podge | Gluing down papers and found objects, sealing layers, transferring images | Matte medium is fantastic because it dries clear and non-glossy, so it won't interfere with your art. |
| Mark-Makers | Charcoal, pastels, permanent markers, ink pens | Adding details, linework, and text | Oil pastels are great for creating a "resist" effect under watercolor or thin acrylic washes. |
| Ephemera | Old book pages, maps, fabric scraps, tissue paper | Adding texture, pattern, and personal meaning | Start a "scrap box." You'll be surprised how often a random piece of paper is exactly what you need. |
Once you have these core items, you can start experimenting. The best part about mixed media is that there's no right or wrong way to combine things—just your way.
The Secrets of Effective Layering
Layering is where the real magic happens in mixed media. It’s how you take a blank, flat surface and build a whole world on it—one full of depth, history, and texture. This isn’t just about gluing stuff down. Good layering is a dance between adding and taking away, a conversation you create between all your different materials.
One of the oldest rules in the book, especially when you're mixing paints, is "fat over lean." Think of it this way: faster-drying, more flexible layers (lean) go down before the slower-drying, oilier layers (fat). For instance, acrylics dry fast and form a solid, waterproof base, so they're perfect to start with. Then, you can easily draw over them with oil pastels or oil-based paint markers. If you try it the other way around, you’ll likely end up with a cracked, peeling mess as the layers dry at different speeds.
The Strategic Order of Application
I always think about the layers in my artwork like a timeline. What goes down first sets the tone for everything that follows. I often start with really thin, watery washes of color—maybe some acrylic inks or watercolors—just to get a mood going. This is the background noise of the piece.
After that first wash is bone dry, it's time to bring in some collage. I use a matte medium to stick down delicate materials like old book pages or tissue paper. A little pro tip: put a thin coat of medium under and over the paper. This seals it right into the painting and preps the surface for whatever you want to do next.
You could, for example, brush a transparent glaze of acrylic paint over some collaged text. This gives you a gorgeous "ghosting" effect where the words are still there, but they feel like part of the background, adding a really subtle hint of story. The right color choice here is everything. You can find more inspiration on how to use color in your art to make those layers pop.
Just look at the incredible dimension you can create with these techniques.
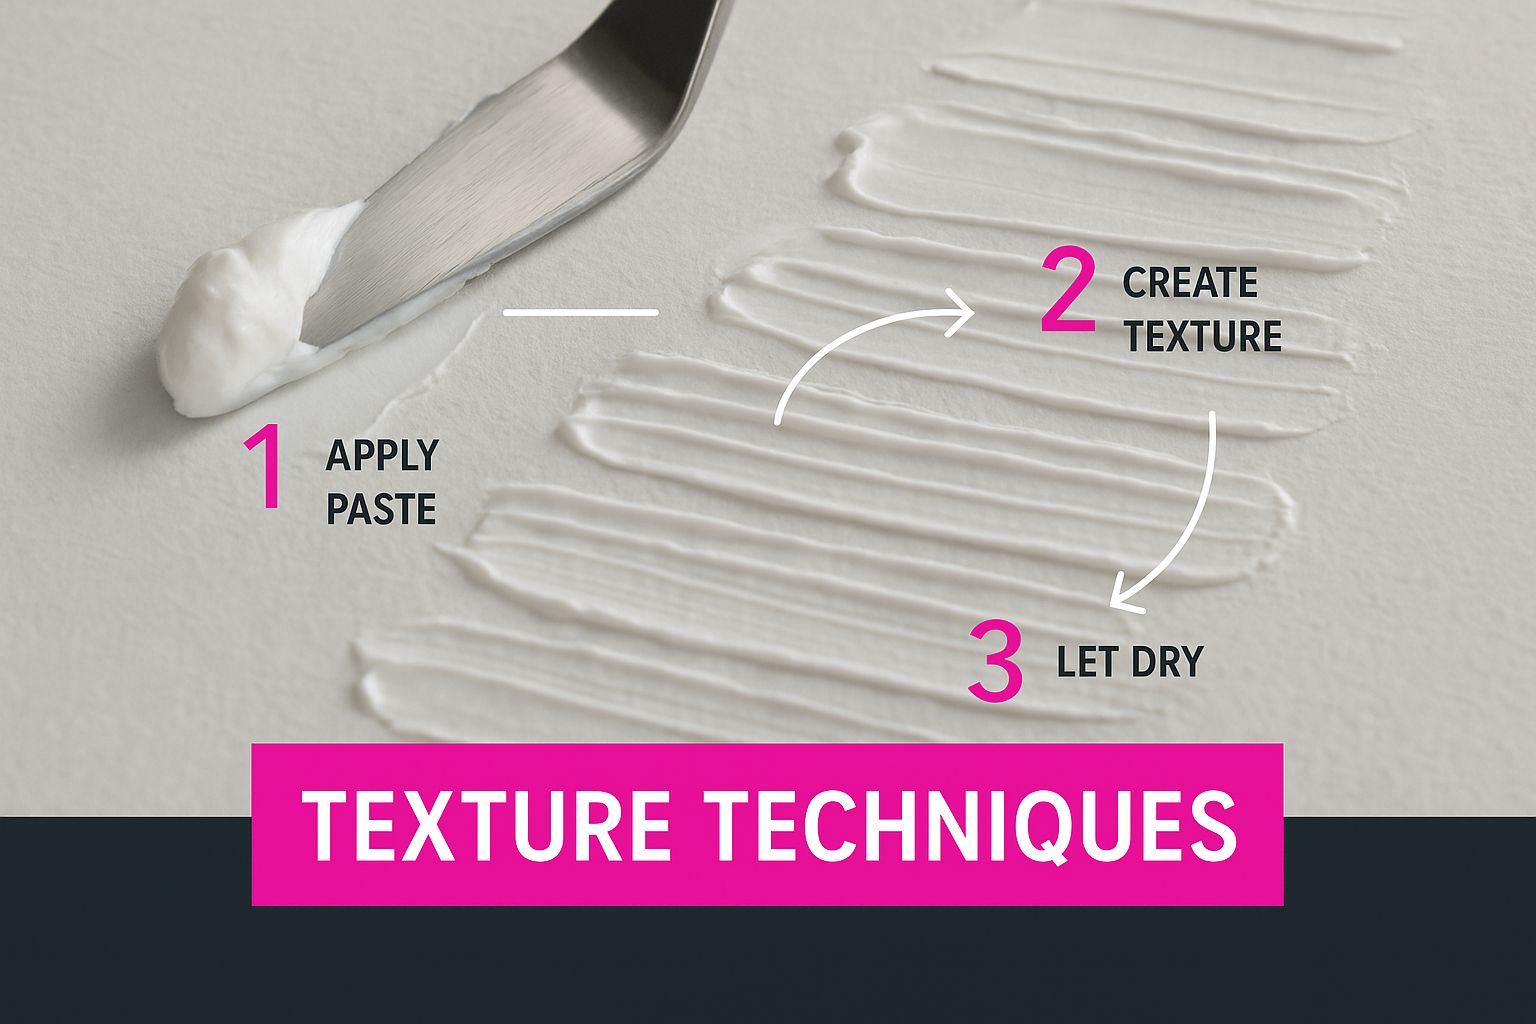
The image really shows how raised materials like modeling paste can add actual physical depth, casting shadows and making you want to reach out and touch the artwork.
Protecting Layers as You Work
We've all been there. You create a beautiful drawing, go to add a wet layer on top, and suddenly… smudge city. It's one of the most frustrating things in mixed media, but this is where sealants become your absolute best friend.
Key Takeaway: A workable fixative is one of the most valuable tools in my studio. It’s like a "save" button for your art, letting you lock in your progress at any stage. It creates a clear barrier that protects what's underneath but still has enough "tooth" for you to add more media on top.
Let's say you've just finished a delicate charcoal drawing over a painted background. Before you even think about adding another wash of ink or paint, give it a light spray of workable fixative. This locks the charcoal in place and stops it from turning your vibrant colors into a muddy disaster.
This trick works for all sorts of materials:
- Pastels and Charcoal: A must-seal before adding any wet media.
- Water-Soluble Pencils/Crayons: Seal them if you want to keep your lines crisp instead of activating them with water.
- Graphite: A quick spray prevents it from creating that weird silvery sheen when you paint over it.
Once you get a feel for your materials and start planning your layers, you'll be able to build rich, stable, and stunning compositions with confidence. These mixed media techniques aren't about following strict rules—they're about making smart choices that bring your creative vision to life.
How to Create Compelling Textures
Truly great mixed media art is something you feel, not just something you see. Texture is what gives a piece its soul, inviting viewers to get closer and imagine running their hands across the surface. It’s how we transform a flat canvas into a dynamic landscape.
And you don't need a studio full of expensive supplies to get started. Honestly, some of the best textures come from the simplest mixed media techniques using things you already have lying around the house.
For example, a classic trick is to press a crumpled piece of plastic wrap into wet acrylic paint. Just leave it there until the paint is bone dry, then peel it back. What you're left with is this incredible, organic marbled pattern. Another go-to for me is stippling thick gesso onto my surface with a stiff brush to build up a rough, sandy base before I even think about adding color.
Building Dimension with Pastes and Gels
When you want to get more intentional and sculptural, that's when texture pastes and gels become your best friends. These are the heavy lifters for adding real body and dimension to your work.
Modeling paste is a thick, opaque medium that’s perfect for building up dramatic peaks and deep valleys. I always think of it like frosting a cake. You can slather it on with a palette knife, sculpting it into sharp ridges or soft, rolling hills. Once it dries, it's solid as a rock and you can sand it, carve into it, or paint right over it.
You can also mix things directly into the paste for a grittier feel. I’ve had great results by adding:
- Sand or coffee grounds: This creates a wonderfully rough, earthy surface.
- Small beads or crushed eggshells: These will give you a chunkier, more unpredictable texture.
Achieving Specific Textural Effects
Beyond just building up general texture, certain mediums are designed to give you very specific, repeatable results. These are fantastic when you need a controlled texture to help tell your piece's story.
One of the most popular is crackle medium. You paint it between two layers of acrylic paint. As the top layer of paint dries, the medium forces it to shrink and crack, revealing glimpses of the color underneath. It’s perfect for creating that beautifully aged, weathered look, as if your artwork has a history all its own.
Here's a little tip I've picked up for using crackle medium: play with the thickness of your top coat of paint. A thicker layer will give you big, dramatic cracks, while a thinner coat creates a network of fine, delicate fissures. It's worth experimenting to see which effect you like best.
Another powerful technique is to use your stencils in a new way. Instead of just dabbing paint through them, try spreading a thin layer of modeling paste. When you carefully lift the stencil, you’re left with a raised, dimensional pattern that adds both visual and physical interest. It's a simple move that makes your surfaces look incredibly complex.
Think of these mixed media techniques as just another set of tools for expression. It’s all about building a surface that feels just as deliberate as your color palette or composition. Of course, juggling all these steps takes some organization. For some helpful ideas, check out this guide on project management for creatives to keep your workflow from getting chaotic.
This is where the magic really happens. We're going to talk about weaving found objects and ephemera into your work—the bits and bobs that give your art its soul. Think old letters, ticket stubs, fabric scraps, rusty keys, or even dried leaves from your garden. These aren't just decorations; they're storytellers, infusing your piece with memory, history, and a tangible connection to the world.
Adding these elements elevates a piece from a simple collage to a rich, visual narrative. But it’s not just about slapping things on a canvas with glue. It's an art of curation and careful integration.
Choosing Objects With Intention
First things first, you need to choose items that actually mean something to your piece. Don't just clutter your work with random junk. Put on your storyteller hat. That faded postcard from your grandmother? It instantly whispers of nostalgia and family history. That scrap of lace? It can evoke softness, elegance, or a forgotten memory.
The most powerful objects are the ones that resonate with the emotional heart of what you're trying to say. I always look for items that have:
- A personal story: Things I've collected on my travels or found on walks hold a certain energy that you just can't fake.
- An irresistible texture: A rusty washer, a piece of frayed burlap, or a smooth pebble can create an incredible tactile contrast against a painted surface.
- A sense of history: Old book pages, vintage maps, or used postage stamps immediately ground your work in another time and place.
A huge part of mixed media is learning to see the artistic potential in what others discard. You start to realize that a seemingly insignificant object can become the anchor for a powerful story. Your focus shifts from just making something pretty to creating something with genuine depth.
Securing Your Treasures The Right Way
Okay, so you've gathered your treasures. Now you have to attach them so they stay put for good. The adhesive you pick is absolutely crucial. The wrong glue can fail years down the line or, worse, eat away at your precious materials. Your choice really boils down to the weight and texture of the object you're attaching.
It’s pretty simple when you think about it: a delicate piece of tissue paper needs a completely different approach than a heavy metal key.
| Object Type | My Go-To Adhesive | Why I Swear By It |
|---|---|---|
| Lightweight Paper & Ephemera | Archival PVA Glue or Matte Medium | They dry perfectly clear and are acid-free, which means no yellowing or decay over time. |
| Fabric, Ribbon & Textiles | Fabric Glue or a good Heavy Gel Medium | These stay flexible when dry and create a strong bond that won't bleed through and ruin the fabric. |
| Heavy Objects (Metal, Wood) | Super Heavy Gel Medium or E6000 | You need industrial-strength grip for heavier items so they don't fall off the canvas. |
Making It All Look Intentional
This last part is what separates the pros from the amateurs. You have to make your found objects look like they belong in your artwork, not like they were just stuck on as an afterthought. You want them to feel completely integrated into the world you’ve created on the canvas.
A few tricks I use all the time are sanding the edges of a photo to make it look aged and well-loved. Or I'll apply a thin, watery wash of acrylic paint over a piece of text to push it into the background, creating a little mystery. You can also use inks and stains to tint a piece of fabric so it harmonizes with your color palette.
When you do this, you’re creating a seamless conversation between your painted layers and your found treasures. They become one story.
Giving Your Artwork the Finishing Touch
You’ve reached the final stretch. All that creative energy, layering, and experimenting has come together on the canvas. Now, it's time to protect that hard work and give it a polished, professional finish that will last a lifetime. This last part of the process is what separates a finished project from a truly complete piece of art.
Sealing your work isn't just about protection; it's about unification. It brings together all the different sheens from your various materials—the glossy gel medium, the matte chalk paint, the metallic powders—into one cohesive surface. More importantly, it creates a crucial barrier against dust, UV light, and curious fingers.
Choosing the Right Sealant for the Job
When it comes to sealing your art, you're generally looking at two main options: spray fixatives and brush-on varnishes. They might sound interchangeable, but they have very different roles to play.
-
Spray Fixatives: Think of these as the first line of defense, especially for delicate dry media. If you've used charcoal, soft pastels, or even pencil, a fixative is essential to prevent smudging. You can find "workable" fixatives that let you keep layering, and "final" fixatives that create a permanent, non-porous top layer. A final fixative is great for works on paper that will live behind glass.
-
Brush-On or Spray Varnishes: This is the heavy-duty stuff. Varnish offers a much more robust and durable topcoat that shields your art from UV rays, moisture, and grime. I consider it non-negotiable for paintings on canvas or wood panels, particularly if they're going to be displayed without glass.
Varnishes also come in different sheens—typically matte, satin, and gloss—and your choice will dramatically alter the final mood of your piece. A gloss varnish can make your colors pop with incredible depth and vibrancy. A matte finish, on the other hand, offers a soft, non-reflective surface that can feel more subtle and modern. Satin, of course, sits right in the middle.
My personal pro tip? Always test your finish. I keep small painted scraps of paper or canvas board handy to test how a varnish looks. A high-gloss finish might look amazing in your studio, but it can create a ton of glare in a brightly lit room. Conversely, a matte finish can sometimes make your darkest darks look a little less intense. There's no substitute for seeing it with your own eyes.
How to Apply Varnish Like a Pro
Applying that final coat of varnish can be nerve-wracking, but with a bit of patience, you can get a flawless finish. The goal is an even, crystal-clear coat, free from dreaded bubbles, streaks, or trapped dust.
First things first: your artwork must be completely dry. I can't stress this enough. Even a slightly tacky layer of acrylic paint can become reactivated by the varnish, leading to a cloudy, milky disaster. I always wait a minimum of 72 hours, but if I have thick paint or heavy gel medium layers, I'll give it a full week just to be safe.
Set yourself up in a clean, dust-free environment. A quick wipe-down of your surfaces an hour before you start can make a huge difference. I use a wide, soft-bristled brush that is reserved only for varnishing to avoid contamination.
Apply a thin, even layer, brushing carefully in one direction. Then, without adding more varnish, immediately go over it again with your brush at a 90-degree angle. This little cross-hatching trick helps ensure you haven't missed any spots. Remember, two thin coats are always, always better than one thick, gloopy one.
Displaying Art with Dimension
What do you do when your art is just too thick and textured for a standard picture frame? This is a common and wonderful problem to have with assemblage or heavily built-up mixed media pieces.
This is where shadow boxes become your best friend. They're essentially deep frames with space between the glass and the backing, giving your dimensional elements plenty of room to breathe.
Another fantastic option is a floater frame. These frames create a small, elegant gap around your artwork, making it look like it's floating inside the frame. It's a really contemporary and sophisticated way to present pieces on gallery-wrapped canvas or wood panels.
By taking the time for these finishing steps, you're not just protecting your art—you're honoring the effort you put into it, ensuring it can be admired for years to come.
A Few Common Mixed Media Questions
As you start splashing, gluing, and layering, you're bound to hit a few snags. It happens to all of us. Getting answers to these common questions can help you sidestep those frustrating moments and keep the creative energy high. Let's dig into some of the things I get asked about the most.
What’s the Best Surface to Use?
Honestly, the "best" surface really depends on what you plan to throw at it. But if you're looking for a solid, reliable foundation, you can't go wrong with heavyweight watercolor paper (140 lb/300 gsm or heavier), a dedicated mixed media paper, or a wood panel prepped with gesso.
Think of these surfaces as the workhorses of mixed media. They're specifically designed to take a beating—from watery ink washes to thick, goopy modeling paste—without giving up. They resist buckling, tearing, or turning into a wavy mess.
I'd strongly recommend steering clear of standard drawing paper or those thin, cheap canvas boards. They just can't handle the moisture and weight, and you'll likely end up with a warped piece that's more frustrating than fun.
How Can I Stop My Colors from Turning to Mud?
Ah, the muddy color problem. This is easily the most common headache for artists new to layering. The secret ingredient here isn't a medium or a tool—it's patience. You have to let each layer dry completely before you even think about adding the next one. This is especially true when working with acrylics or other water-based paints. Rushing this step is the fast track to a brownish, indistinct mess.
Another trick I swear by is creating a physical barrier between your layers.
I like to think of it as hitting the "save" button on my progress. By sealing a dry layer with a thin coat of clear matte medium or a light spray of workable fixative, you lock it in. This clear barrier stops the new wet paint from reactivating and blending with the gorgeous colors you just laid down.
It’s a simple but incredibly effective technique that lets you build layers with confidence.
What's the Right Glue for Heavy Embellishments?
When you graduate from paper and start adding things with some real heft—like metal charms, old keys, vintage buttons, or small wood scraps—your trusty craft glue isn't going to be enough. You need something with serious holding power.
For these heavier items, your best friend is a thick gel medium (I use both gloss and matte) or an industrial-strength craft adhesive. I often lean towards gel medium because it's archival quality and dries clear, becoming a seamless part of the artwork itself.
Don't be shy with it! Apply a generous blob to the back of your object, press it firmly onto your surface, and give it plenty of time to cure based on the manufacturer's directions. This ensures your special finds stay put and don't pop off your canvas a month later.
Ready to explore art that speaks to both your intellect and your soul? Discover the emotionally charged, large-scale works of Wiktoria Florek, a visionary artist who transforms canvas into an energetic portal of meaning and presence. Explore her collection.